I slipped into my kitchen after a long day at work with my apron half untied and my mind buzzing. I was determined to bake something that felt special yet simple. I grabbed my mixing bowl and dusted my counter with flour while I thought of that first bite. It hit me that a creamy dessert based on a crunchy biscuit base would do the trick. I dug out my bag of Lotus Biscoff biscuits for the crust and lined my springform pan with parchment paper. I didnt want anything too fussy so I warmed the oven just enough to give the base a gentle bake
The next morning I woke up to the sweet aroma still lingering in my house. It felt like a cosy patisserie right in my own home. That is how I first discovered my passion for a lotus cheesecake that combined sweet spice from the biscuit crumb and a velvety custard that melts on your tongue. You are going to love how quick the oven baking method is and how the cream cheese main ingredient turns into a dreamy filling
Why you will love this treat
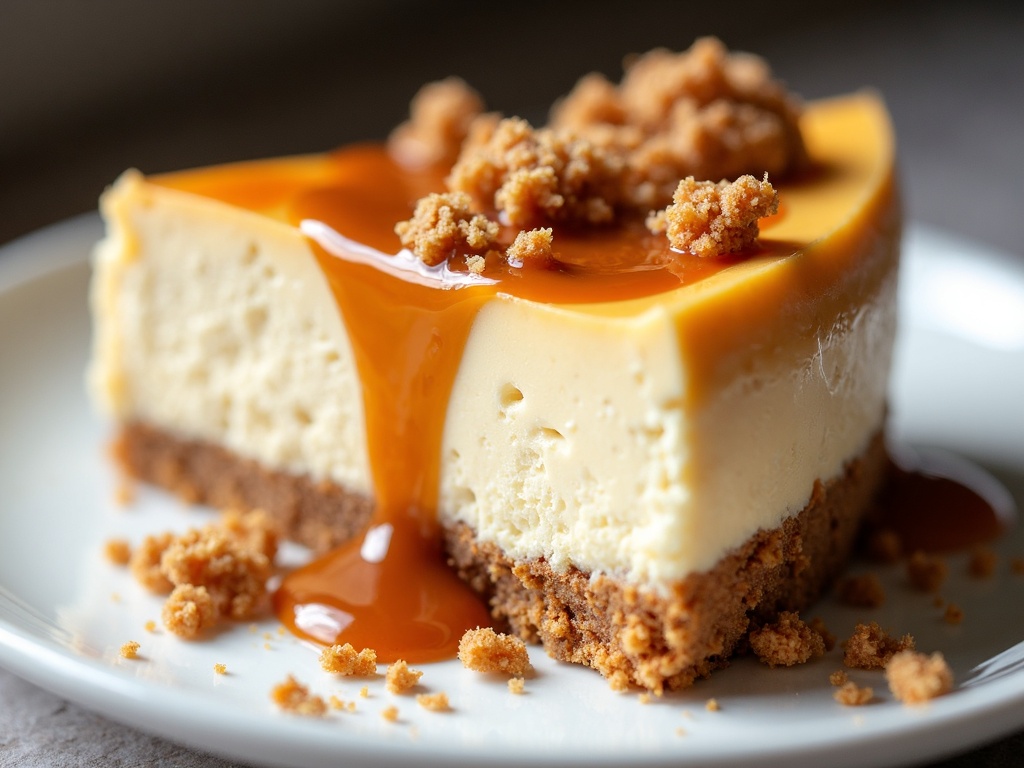
- You see buttery biscuit base that stays crisp while you slice into creamy layers
- You enjoy a no bake cheesecake twist yet you still bake the crust for warmth
- The cream cheese filling feels indulgent yet it is cosy for any evening gathering
- This dessert fits a Euro dessert style with a hint of cinnamon and caramel notes
- You can make it ahead which frees up your time on party day
Lotus cheesecake ingredient rundown
- Lotus Biscoff biscuits crushed into fine crumbs that give a warm caramel spice note
- Unsalted butter melted into those crumbs for a sturdy and rich biscuit base
- Cream cheese at room temperature to ensure a super smooth filling with no lumps
- Granulated sugar to sweeten while balancing the tang in the cheese mix
- Heavy cream whipped yet not over beaten to add lightness and texture
- Vanilla extract for a gentle aroma that ties all flavours together
- Ground cinnamon a pinch to echo the spice in the Lotus biscuit crumb for unity
Quickfire steps with whys
- Step one prepare the pan line your springform pan with parchment paper so the cake lifts easily when you slice it
- Step two pulse your biscuits crush those Lotus biscuits in a food processor to get an even crumb that bakes uniformly
- Step three melt and mix stir melted butter into the crumbs because it binds the base and crisps it in the oven
- Step four bake the crust stick the base in your preheated oven for ten minutes to give a golden colour and firm structure
- Step five whip the filling beat cream cheese sugar vanilla and a dash of cinnamon until silky smooth to avoid lumps and get that creamy texture
- Step six fold in whipped cream gently fold in the cream so you keep air and lightness in each slice of your dessert
- Step seven chill overnight cover the pan and let it hang out in the fridge this gives the filling time to set firm as you sleep
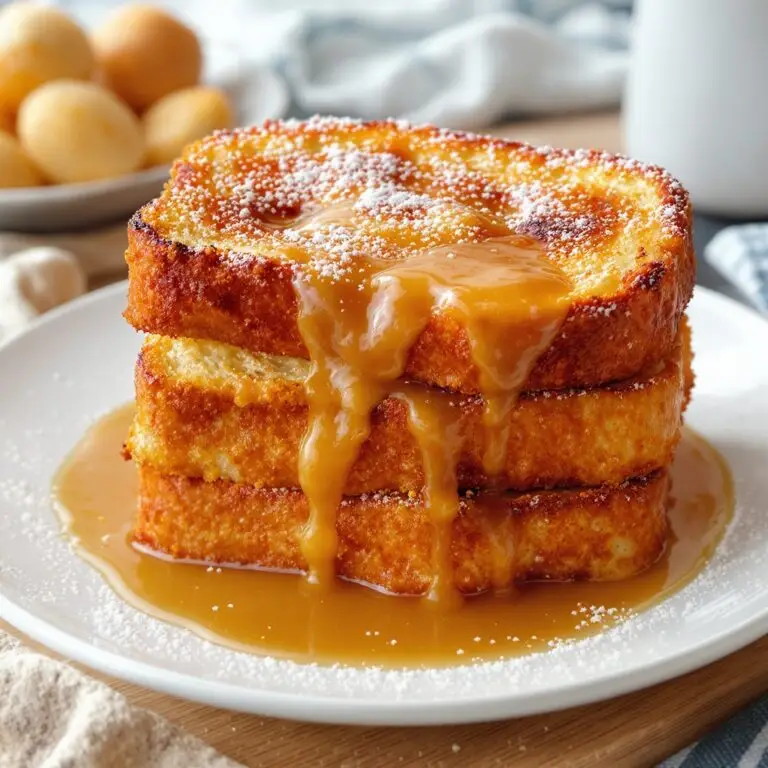
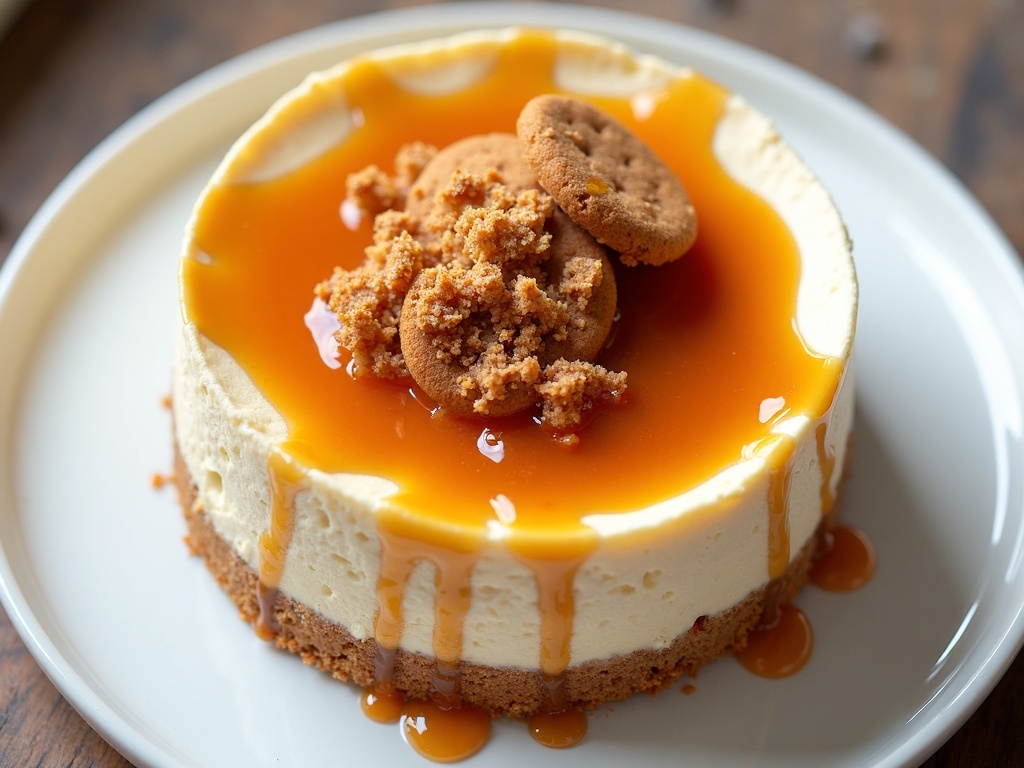
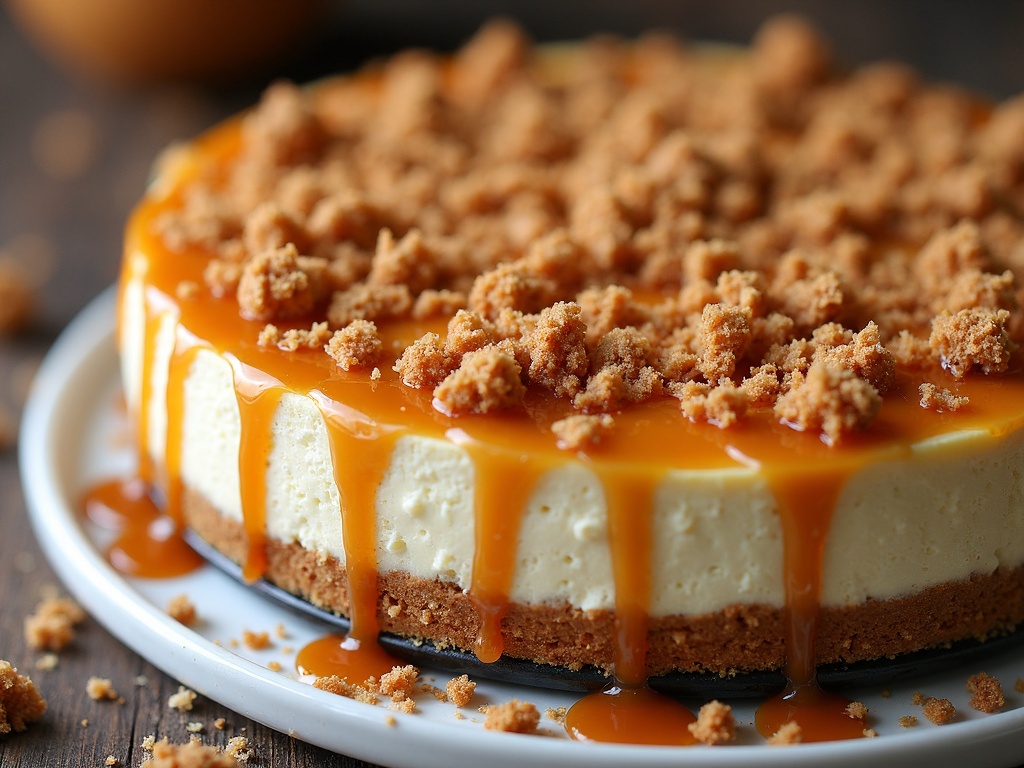
- Step eight garnish and serve top with crushed Lotus Biscoff crumbs fresh berries or a drizzle of caramel sauce for colour and crunch
Clutch shortcut tips
- Use store bought Lotus spread thinly swirl some on top before chilling that saves you time and adds a glossy finish
- Opt for a hand mixer it saves you effort when you whip cream cheese and heavy cream but a whisk works if you are patient
- Freeze leftover biscuits so you can pulse them for the next crust and save a step later
- Swap sugar for icing sugar it blends faster so you skip the risk of gritty filling and you keep your texture silky
First bite grin moment
I sliced my first piece late one evening while the house was quiet I carried the plate to the living room and sat under the soft glow of my lamp. The crisp crumb gave way under my fork and the cream cheese filling felt so smooth it melted almost before it reached my tongue. I nearly giggled out loud at how the spun sugar sweetness worked with the warming cinnamon spike from the biscuit crumb. You might think a simple setup cannot deliver this wow factor but when you pull it off you beam in pride and you cant help sharing the moment with anyone who will listen
Chill serving ideas
- Berry cascade top each slice with fresh raspberries and a sprinkling of powdered sugar for a pop of colour and tartness
- Tiny tartlets spoon filling into mini tart pans lined with crushed Lotus crust for individual bites
- Coffee pairing set out a strong espresso or latte so each bite is balanced by a rich coffee sip
- Fruit salad spoon serve a small side of mango strawberry mint salad so you can alternate bites and lighten the sweetness
Leftover stash and reheat guide
Once you have a stash of leftover lotus cheesecake you will want to keep it fresh and ready for quick snacks. I slice it into squares and wrap each in cling film so it stays moist. If I know I am hosting a crowd I freeze a few wrapped portions and pull them out an hour before serving. They soften to the perfect texture while you chat and set the table
When it comes to reheating you do not want to melt your filling so let the slice rest at room temperature or pop it on a warm plate instead of the microwave. A few seconds on a low setting can do the trick if you are impatient but I found that a warm porcelain dish gives just enough heat without any risk
You can even layer slivers between parchment pieces in a sealed container to keep the crumbs crisp overnight in the fridge then let them breathe before plating up again
Feel good finish and common questions
I hope you feel ready to dive into that first tangy sweet bite of lotus cheesecake. It is my go to for busy nights and family gatherings. I love how you can prep each step ahead and still get rave reviews. You do not have to be a pastry chef to nail this treat you just need a few key ingredients and a little patience as it chills
Here are some questions you might wonder about
Can I use light cream cheese in the filling
You can swap for a lighter version but it might be a bit less rich and may take more time to set firm in the fridge
Do I need a food processor for the biscuit crumbs
You do not need one a rolling pin inside a sealed bag works just fine and gives you a bit more control over the texture
Can I replace heavy cream with yogurt
If you go that route your filling may be tangier and looser follow a no bake style by adding gelatin to help it firm up
How long can I store this cheesecake
It keeps well for up to four days in the fridge if it is covered to stop it drying out
Is there an egg free way to bake this crust
The crust is already egg free that is one of the perks of this recipe so you are all set without any swaps

Lotus Cheesecake
Ingredients
Equipment
Method
- Line the base of your springform pan with parchment paper.
- Crush the Biscoff cookies in a food processor or by placing them in a ziplock bag and crushing with a rolling pin until fine crumbs form.
- Combine the cookie crumbs with melted butter in a bowl. Mix until the texture resembles wet sand.
- Press this mixture firmly into the bottom of the springform pan to form an even layer. Place in the fridge to set while you make the filling.
- In a large mixing bowl, beat the cream cheese, icing sugar, 150 g Lotus Biscoff spread, and vanilla extract until smooth and fluffy using an electric mixer.
- In a separate bowl, whip the cold cream to soft peaks.
- Fold the whipped cream into the cream cheese mixture until fully combined and smooth.
- Spoon the filling onto the chilled cookie base, spreading evenly and smoothing the top.
- Cover and refrigerate for at least 4 hours, or until fully set.
- Once set, gently run a knife around the edge and remove the sides of the pan.
- For the topping, gently warm the 80 g Lotus Biscoff spread in a small saucepan or microwave until pourable (not hot). Pour over the cheesecake, spreading gently to the edges.
- Sprinkle the top with crushed cookies and refrigerate for 15 more minutes to set the topping.