pita bread recipe reasons you will love
- The recipe is simple with just flour yeast salt water and a pinch of sugar inviting beginners to bake their own Middle Eastern flat bread
- It puffs up in a hot oven creating a soft pocket perfect to fill with your favorite proteins and veggies
- This cooking method lets you use a skillet or a baking stone making it easy to adapt to any kitchen setup
- Homemade pita tastes fresher than any store bought loaf and adds a warm touch to family dinners
- The dough can rest in the fridge for hours letting you plan ahead and save time on busy nights
One afternoon I had a bag of flour on the counter glasses of milk in the fridge and a grocery list that was still half empty I was juggling cooking homework and a call for the dog walker all at once
Thats when I spotted the little note I put on my phone about a pita bread recipe Id saved weeks ago It felt like a small sign to give baking a try even if my kitchen was a chaos
I rolled up my sleeves dusted the counter with flour and followed the mix knead and bake steps Before I knew it small bubbly disks of soft warm bread peeked at me from the oven rack
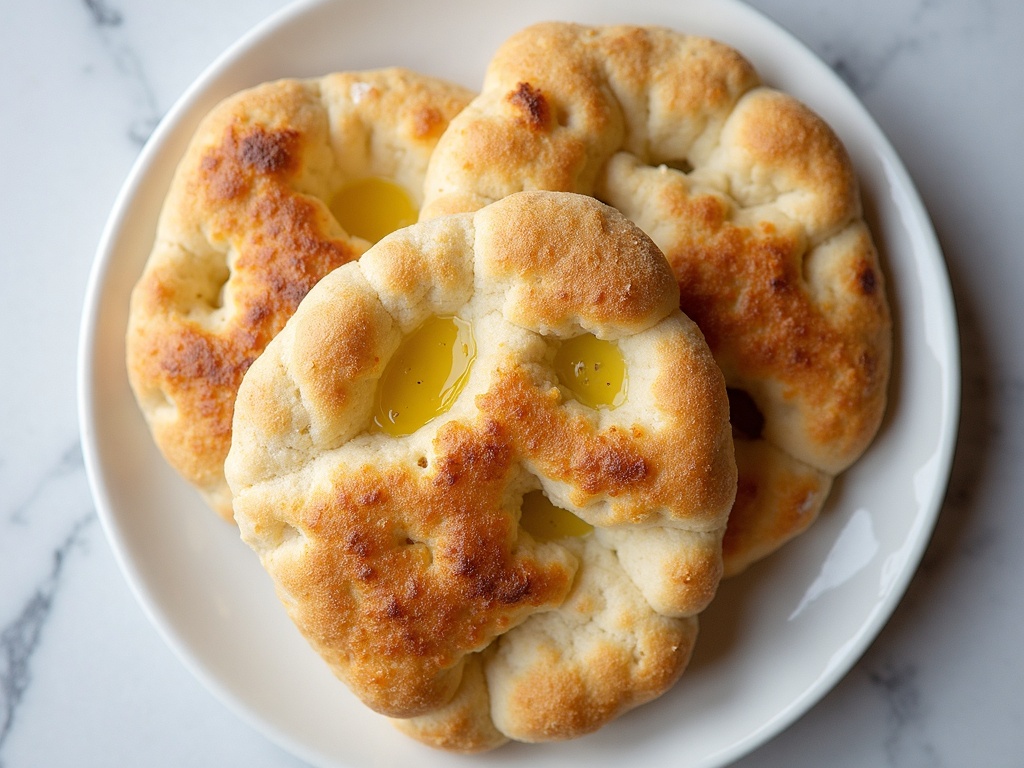
My heart gave a little skip when I split one open to find a perfect pocket ready for filling The smell of warm bread and the taste of fresh olive oil and herbs brought back memories of street stands in Cairo where I tried flat bread for first time
What makes this pita special
- Uses classic baking method to puff up and create a soft edible pocket in minutes making it a fun weekend project
- Main ingredient is all purpose flour giving a chewy crumb that holds up well to wraps and dips
- Inspired by Middle Eastern home cooking so you get a genuine cuisine style flavor without much fuss
- Yeast fermentation adds a subtle tang improving taste and helping you digest bread more easily
- Freezes and reheats beautifully letting you make big batches for meal prep or spontaneous gatherings
Grab bag ingredient rundown
- All purpose flour use a flour with around eleven percent protein for good chew and room to puff open in the oven
- Instant yeast brings a fast rise no need to proof it separately just mix and go saving you a little time
- Warm water at about one hundred ten degrees Fahrenheit helps yeast activate quickly without killing it
- Salt balances the flavor by slowing yeast activity a bit helping your dough develop taste in that rest period
- Sugar feeds the yeast so it can get going right away giving you a nice rise in under an hour
- Olive oil optional for brush on tops or in dough adding richness and a hint of Mediterranean flair
- Flour for dusting keep extra on hand to roll out the dough without it sticking to your surface or rolling pin
Quickfire steps with whys
- Combine dry ingredients in a large bowl adding yeast salt and sugar then stir until evenly mixed this ensures each pita has balanced taste
- Pour in warm water slowly while stirring with a wooden spoon this helps hydrate the flour fully without clumps
- Mix until the dough starts to come together then transfer to a floured surface to knead twenty seconds at a time this builds gluten for chew
- Place dough in a lightly oiled bowl cover with a towel and let rest thirty to forty minutes this lets yeast do its work and develop flavor
- Divide dough into six to eight equal balls then flatten gently with your fingers before rolling into circles this ensures even puffing
- Preheat a skillet or baking stone until very hot this blast of heat causes steam inside the dough creating the signature pocket
- Cook each round thirty to forty seconds per side until golden spots appear then finish on the opposite side for ten seconds sealing the pocket
Clutch shortcut tips
- Use a kitchen scale for precise flour measurement if you can skip any guesswork when you mix for consistent dough texture each time saving a lot of fuss
- If your kitchen is cold let the dough rise in the oven with just the light on creating a gentle warm spot so fermentation never stalls
- Skip extra resting by doing a quick ten minute rest after kneading then roll and cook if you need pita bread fast on busy nights
- Work with half the batch if you have limited space in skillet and refrigerate the rest to bake fresh pitas later in the day
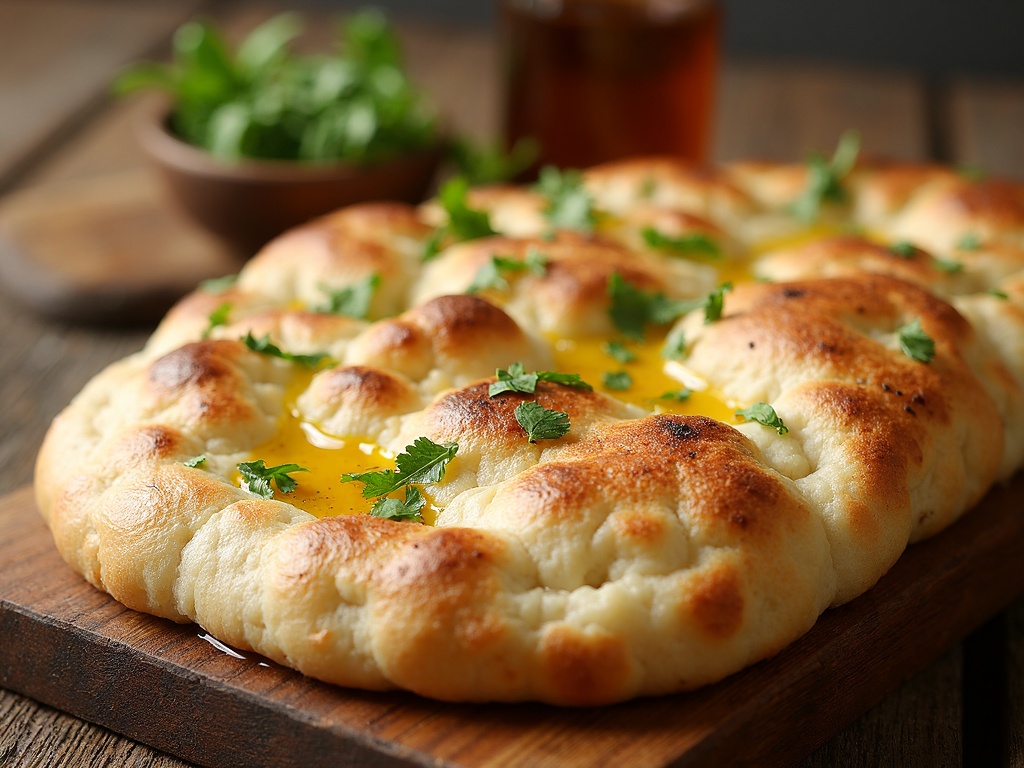
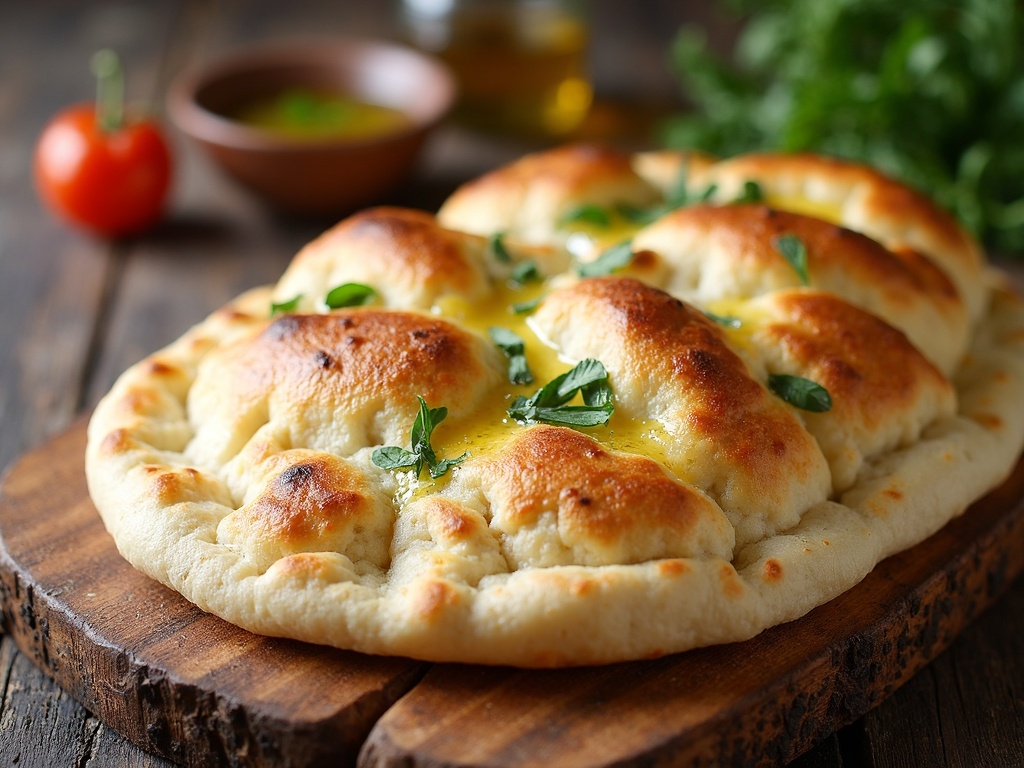
- Brush each finished round with olive oil and a sprinkle of zaatar or garlic powder for instant flavor boost making simple meals feel special
First bite grin story
When the first loaf came out warm from the oven I couldnt wait to taste it dipping a bit of edge into olive oil I took the first bite slowly feeling how soft cushion gave way to chewy crumb
My taste buds woke up to that gentle hint of salt and yeast and for a moment all my errands and chores felt miles away It was so simple yet felt like a small triumph
Chill serving ideas
Now that youve mastered the base pita you can serve it in many fun ways to please everyone at the table
- Fill pockets with grilled chicken chopped veggies and cool yogurt dressing for a light easy dinner that feels like a street fair treat
- Spread a layer of hummus top with sliced cucumbers fresh herbs and a drizzle of olive oil for a quick healthy snack
- Use as a plate for dipping into spicy shakshuka or lentil soup scooping up every last bit with the warm soft bread
- Turn them into pizza pockets add tomato sauce cheese and your favorite toppings fold and bake until melty and golden
Leftover stash and reheat guide
You can keep extra pita in an airtight bag in the fridge up to three days or freeze slices for a month or two making sure you wrap each in foil
To reheat cold pita pop it in a skillet over medium heat for thirty seconds per side or slide it onto a hot baking stone in your oven
If you use a microwave wrap the pita in a damp paper towel and heat in thirty second bursts this revives moisture without turning it chewy

For frozen pita let it thaw at room temperature in its wrapping then follow the same skillet or oven method for a fresh soft result
Wrap up and common questions
I love how this pita bread recipe gives me fresh pockets for any meal and how the simple process invites me to bake even on busy days It feels like a mini celebration when that first pocket puffs open
With easy ingredients and a few simple steps you can bring Middle Eastern flair into your kitchen Youll be proud of each puff that pops open revealing its soft inside
What is the best way to store pita after baking
Let pitas cool completely then stack them with a bit of parchment or wax paper between each round and place in a zip top bag in the pantry for a day or two
How do I reheat frozen pita
Take frozen pita from the freezer and let sit at room temperature in its wrapping for ten to fifteen minutes then warm in a skillet over medium heat or in a hot oven
Can I use whole wheat flour
You can swap up to half of the all purpose flour with whole wheat to add fiber and nutty flavor Just expect a slightly denser pocket and adjust water as needed
Why didnt my pita puff in the oven
Pitas may not puff if the oven or skillet was not hot enough or if the dough was rolled too thin Check your surface temperature and roll to about one fourth inch thickness
Pita Bread Recipe
Ingredients
Equipment
Method
- In a large mixing bowl, combine warm water, sugar, and yeast. Stir and let sit for 5 minutes until foamy.
- Add the flour, salt, and olive oil to the bowl. Mix with a wooden spoon until a dough starts to form.
- Turn the dough out onto a lightly floured surface. Knead for 7-10 minutes until smooth and elastic, adding a tiny bit more flour if too sticky.
- Place the dough in a lightly greased bowl. Cover with a clean towel or plastic wrap. Let rise in a warm place for about 1 hour or until doubled in size.
- Preheat oven to 250°C (480°F), placing a baking sheet or pizza stone inside. Alternatively, heat a cast-iron skillet on medium-high.
- Punch dough down, transfer to lightly floured surface, and divide into 6 equal pieces. Roll each into a ball, then flatten each into a disk about 0.5 cm (¼ inch) thick and 14–16 cm (5–6 inches) in diameter.
- Working in batches, transfer the disks (2–3 at a time) onto the preheated baking sheet or skillet. Bake or cook for about 2–3 minutes; they will puff up dramatically. Flip if using a skillet for even cooking. Remove when lightly golden and transfer to a wire rack.
- Repeat with remaining dough. Cover baked pitas with a clean towel to keep them soft as they cool.