The other day I tried making a chicken sandwich without much thought. I just slapped some bread around a piece of cooked meat and figured it was done. That first bite was dry like cardboard and I almost packed up and went for takeout.
Turns out I had no idea how much caramelization and breading technique matter. My protein set was weak since I rushed the resting step. I did not let the meat chill so juices ran out as soon as I cut into it. There was zero crunch and my curiosity fell flat.
Then I began geeking out about surface browning protein set and slow simmer in the sauce. I got real serious about spice ratios and heat control. That was my aha moment and changed how I built the next chicken sandwich. Im already dreaming about my next chicken sandwich and testing new spice combos.
Why science wins here
When you bring science into your cooking you get out great texture and dang fine flavor. Here are some key wins that each of us can geek out on while building a next level chicken sandwich
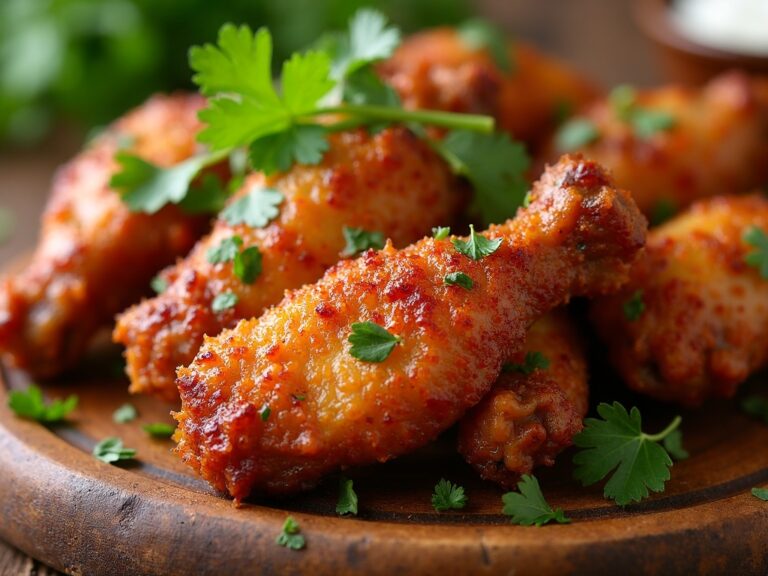
- Turning sugars into deep rich browning through caramelization gives that crust a real satisfying snap that you want when you bite a chicken sandwich
- Proper protein set means the meat holds onto its juices instead of drying out mid bite making each mouthful dang juicy
- Control over slow simmer in a sauce or gravy helps meld spices so every layer tastes even and complete
- Even heat distribution on your pan surface stops hot spots so the meat cooks level without burnt patches
- Surface browning reaction not only preserves moisture but also amps up savory notes for a deeper taste vibe
- Chilling and resting the meat lets fibers relax for a tender bite that shows off that careful slice on your sandwich
Ingredient role roster
Every part of a chicken sandwich does a job and knowing what each one brings can help you tweak flavor and texture like a pro. Keep these in mind when you decide on your next chicken sandwich adventure. Here is the lineup and what they do toward that perfect chicken sandwich bite
- Chicken breast trimmed and pounded thin helps cook fast and evenly while letting that protein set at medium heat for a tender texture
- Bread slices toasted just right gives a sturdy base for juices and crunch from caramelization on the crust
- Mayo or aioli adds creamy fat that carries flavors evenly and keeps the sandwich from feeling dry
- Neutral oil like canola or vegetable helps you get even surface browning in your pan without smoke or flare ups
- Salt and pepper sit on the surface to boost the meat flavor pulling water out at first then helping with that crust formation
- Dill pickle slices bring sharp acidity that cuts through the richness and gives a satisfying tang to the sandwich
- Crisp lettuce leaves add fresh green crunch and create a barrier so the bread wont turn soggy from sauce or juice
- A light marinade of lemon juice garlic and herbs can tenderize the meat and build depth before cooking with slow simmer or searing
Prep moves part one
You gotta start with the chicken pat down and season. Lay your chicken breast flat on a plate and use the flat side of a mallet or a heavy pan surface to pound it out to about quarter inch thick. That step makes it cook evenly so you avoid raw spots and overdone edges
Next mix salt pepper and maybe a bit of paprika with sugar for an edge on caramelization. Sprinkle it all over both sides and press gently so it clings. Let it sit at room temp for ten minutes it helps the seasoning work into the meat and not just sit on top
Then get your bread and toast it light on a pan or under the broiler. That gives you a nice foundation for your sandwich so it wont soak up all the juices and go soggy. While it toasts you can prep any toppings like slicing lettuce or grab a jar of pickles from the fridge for crunch
If you got time whip up a quick marinade of olive oil lemon juice garlic and herbs. Let the chicken soak for at least half an hour so all those flavors sink in Then pat it dry before seasoning for better surface browning on your chicken sandwich
First taste reactions
That moment you take a big bite of your creation and cheeks go wow is something else. The crust crackles under your teeth then gives way to juicy tender meat that was set just right. That toast on the bread is still warm crisp and carrying all the mayo and tang from the pickle
One more chew and you notice how that layer of mayo spreads between the bread and chicken making each bite smooth. The pickle adds a zing that cuts through richness so its never cloying. Here you get that dang satisfying combo of crunch juice and flavor in one heck of a chicken sandwich
Cooking moves part two
Heat a skillet over medium high heat and add just enough oil to coat the bottom. You want the oil shimmering before the chicken goes in so it can sear not steam
Place the seasoned chicken gently in the pan then let it sit undisturbed for two to three minutes. That pause is key for even caramelization. Peek at the edge for a golden crust then flip and repeat on the other side until an internal temp of one hundred sixty five is hit. This way you know its spot on for a delicious chicken sandwich
Once it cooks transfer the chicken to a rack for about five minutes. That rest lets the protein set so juices stay locked in instead of running out when you slice or bite. You get meat that is juicier and more tender after this little wait
After resting wipe the pan clean and return it to medium low heat. Add leftover marinade or a splash of broth then let it go into slow simmer so you pick up all those brown bits. Stir gently and scrape up every bit or youll miss out on savory goodness. That sauce clings to the chicken and makes your next chicken sandwich feel extra rich
Nerd handy notes
Dont crowd the pan when you cook chicken. If pieces overlap youll trap moisture and steam instead of getting that valuable surface browning. Giving each breast space is small detail but makes a big difference when you assemble your chicken sandwich
If youre tracking temps an instant read thermometer can be your best friend here. Stick it in the thickest part and look for a reading of one hundred sixty five degrees fahrenheit. That is where safe cooking meets a perfect protein set
Want to amp up flavor even more try brining your chicken in a salt sugar water mix for a few hours. It helps with moisture retention and sets up your surface to carry spice and caramelization better during searing
Easy plating flair
Keep it simple so your chicken sandwich steals the show. Place a crisp napkin on a plate or platter then lay the toasted bread on top. Next layer the chicken breast at a slight angle so you can peek at that golden crust
Add fresh lettuce leaves and cheese slice if you like. Serve with a handful of fries or chips on the side. You can use fresh herbs like parsley or cilantro for a pop of green color and extra aroma
Drizzle a bit of your pan sauce around the edge for a restaurant style finish. Yall will feel dang proud you made that chicken sandwich look this good
Flavor variants and tweaks
If you want to switch up your chicken sandwich try using cajun seasoning or smoked paprika for a deeper heat note. You can also brush on a thin layer of honey mustard before searing to get extra caramelization and sweet tang that pairs real well with that protein set stage
For a twist on texture consider swapping the bread for a toasted brioche bun or a sturdy ciabatta roll. Each bread brings its own crumb and crust so you can tune the crisp factor and how much sauce it can hold
Sauces are where you can go wild yall can whip up a quick garlic aioli with garlic lemon juice and mayo or mix greek yogurt with herbs for a lighter vibe. Add sliced avocado or pepper jam for creaminess or sweetness Another hack is layering cheese on the meat and pop under broiler briefly for a melt that locks in moisture
Storage tips and shelf life
If you got leftovers wrap each chicken breast in foil or plastic wrap and pop it in an airtight container. Store in the fridge for up to three days and youll still have tasty meat that can go straight into your next chicken sandwich
For longer storage freeze the chicken on a sheet pan then transfer to freezer safe bags. That quick freeze stops big ice crystals so the meat wont turn tough. You can keep it frozen for up to three months and still get good texture when you defrost
When reheating keep it gentle yall can warm it in a low oven or slow simmer in a bit of sauce on the stove top. That helps prevent overcooking and keeps the protein set steady so the chicken stays juicy not rubbery
Key takeaways
Building a solid chicken sandwich is part science part art. You gotta consider caramelization protein set and temperature control so every bite comes out juicy and not dry. Each step from pounding the meat to resting and slow simmer in the pan sauce matters in its own way
Dont cut corners let your meat chill after cooking and keep your heat steady. Focus on surface browning and proper seasoning for that satisfying crust and flavor build. Once you nail these basics you can riff on spices breads or toppings to make that chicken sandwich your own
Cooking science faqs
Q Why is my chicken sandwich always dry
A Dry chicken is often a result of cutting the rest stage short and cooking too hot too long Make sure you hit an internal temp of one hundred sixty five degrees then rest the meat to let the protein set locking in juices You can also brine the chicken ahead for extra moisture retention
Q How do I speed up caramelization on the crust
A Use a touch of sugar in your seasoning and get the pan hot enough for a good sear Too much oil will slow browning so keep it light and let the meat touch the surface directly A well oiled pan can also transfer heat better boosting the browning reaction on your crust
Q Can I use leftover marinade as a sauce
A Yes but you must simmer it first to kill bacteria A slow simmer for five minutes will work Scrape up the brown bits from the pan for flavor Then cool before storing so the sauce stays thick and wont dilute your chicken sandwich
Q What helps keep the bread from going soggy
A Toast the bread surface and add a layer of mayo or butter before piling on juicy ingredients That barrier helps prevent liquid from seeping in and turning your chicken sandwich into a mess Also you can lay down lettuce leaves as another shield against moisture
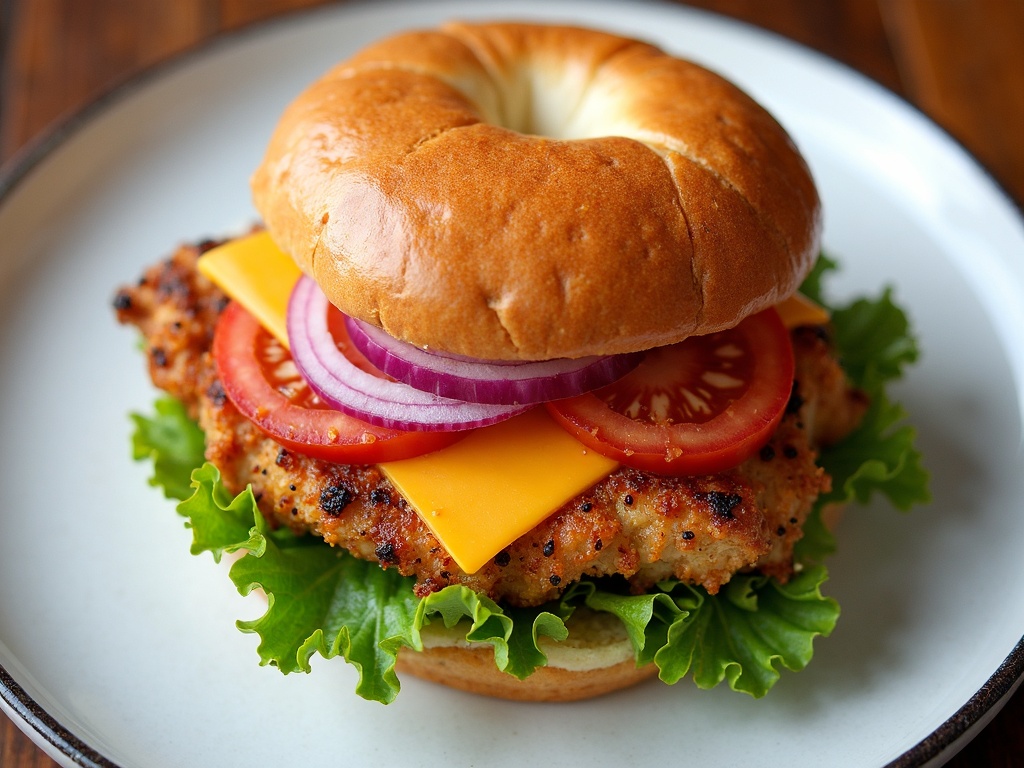
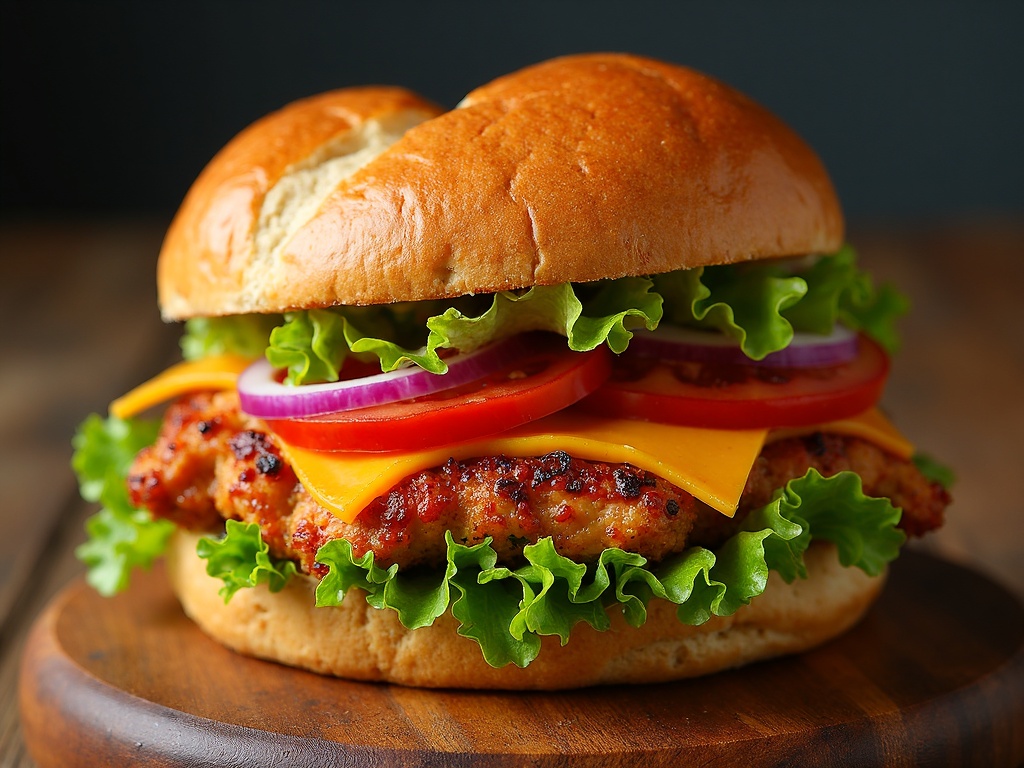
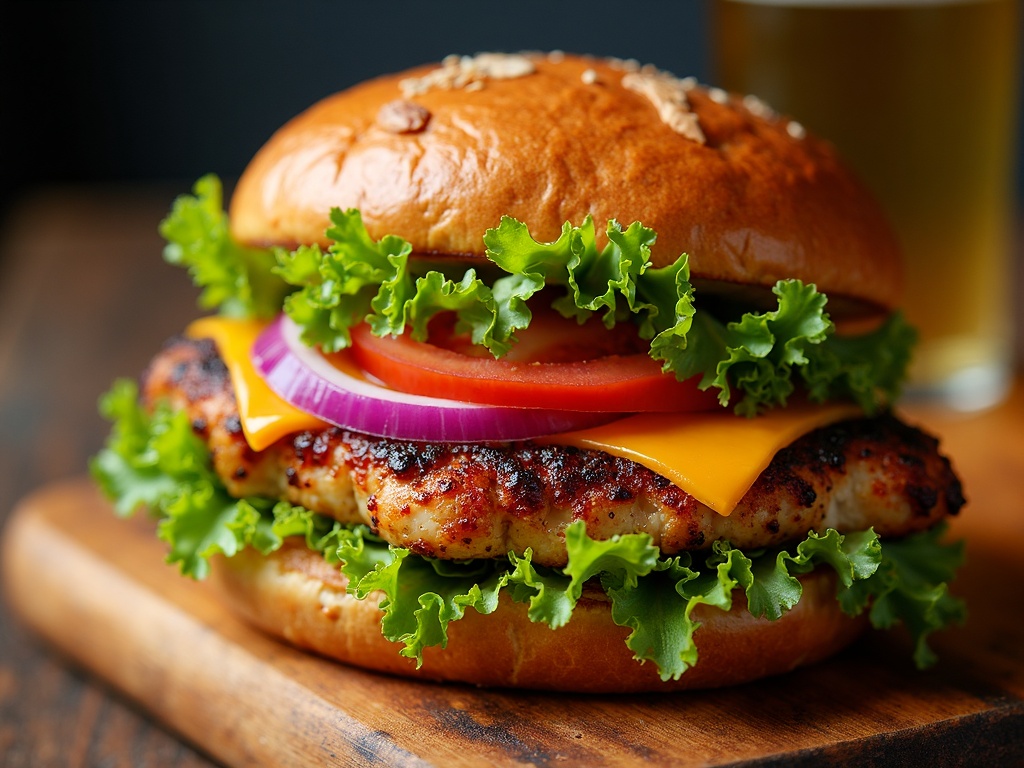
Chicken Sandwich
Ingredients
Equipment
Method
- Preheat the skillet or grill pan over medium-high heat. Lightly oil the surface or use cooking spray.
- In a mixing bowl, coat chicken breasts with olive oil, salt, black pepper, garlic powder, and paprika. Mix well to evenly season.
- Place the chicken breasts in the hot skillet. Cook for 6-7 minutes per side, or until fully cooked and golden-brown. Internal temperature should reach 75°C (165°F).
- Optionally, place a cheddar cheese slice on each chicken breast during the final minute of cooking to melt.
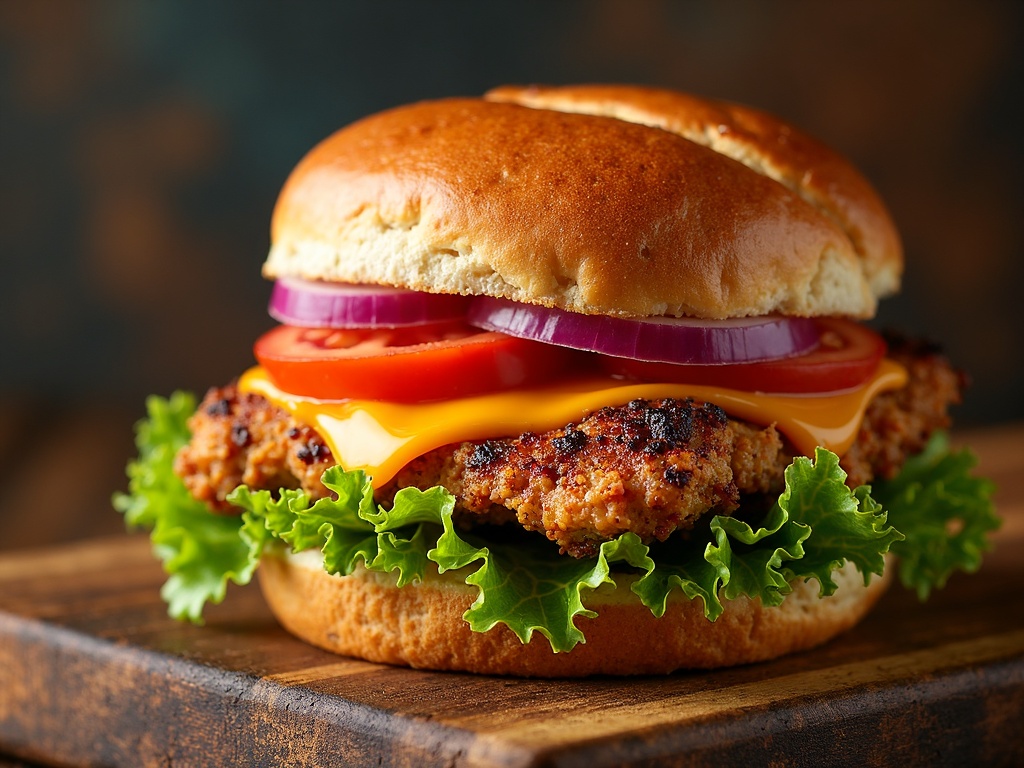
- While the chicken is cooking, slice the tomatoes and onions. Prepare the lettuce leaves and buns.
- Toast the buns lightly on the skillet for 1 minute until golden.
- Spread 1 tablespoon of mayonnaise on the bottom part of each bun.
- Layer lettuce, cooked chicken breast, tomato slices, and red onion on each bun. Top with the other half of the bun.
- Serve immediately while warm for best flavor and texture.